
Building an antler chandelier is a fun and unique way to add some rustic flair to your home. Here are the supplies you’ll need:
-Antlers (real or fake will work)
-Drill with a 1/4″ drill bit
-Jigsaw with a wood blade
-Paint or Stain (optional)
- Gather materials including a chandelier base, fake or real antlers, wire, and hot glue
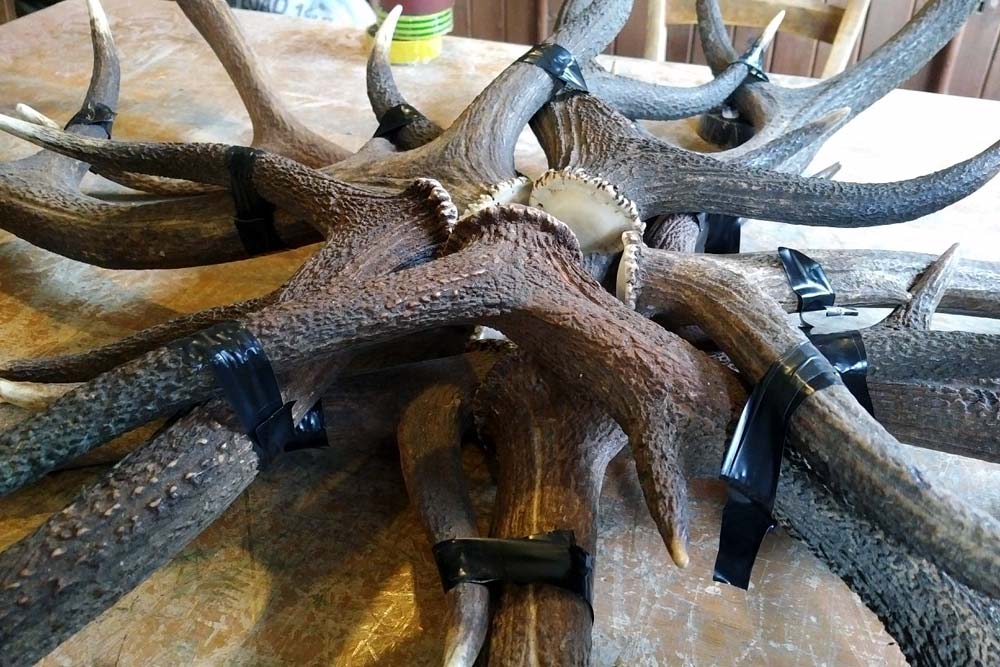
- Start by attaching the antlers to the chandelier base with wire or hot glue
- Once all of the antlers are attached, begin wrapping them with wire to give them stability and added support
- Finally, add any additional decorations such as beads or ribbon before hanging your new chandelier!
Diy Antler Chandelier Kit
Fall is the perfect time to go on a nature hike and collect some unique items to use in your home décor. One item you can find on a hike and turn into a beautiful chandelier is antlers! With a little bit of creativity, you can make your own DIY antler chandelier kit.
What You’ll Need:
-4-6 antlers (real or fake)
-Drill with a ¼” drill bit
-12 feet of thick gauge wire or fishing line
-Needle nose pliers
-Wire cutters
Instructions:
1. If using real antlers, clean them with soap and water then let them air dry completely. If using fake antlers, skip to step 2.
2. Drill a small hole in the center of each antler about ½” from the base. The hole should be big enough to fit your wire or fishing line through easily.
3. Cut 4 pieces of wire or fishing line that are 3 feet long each.
Thread one piece of wire through each drilled hole starting from the bottom of the antler and leaving about 6 inches at the top for hanging later.
4. Tie all 4 wires together at the top in a knot, making sure it’s tight so your antlers will stay in place. Trim any excess wire or fishing line then use needle nose pliers to curl the end so it doesn’t poke anyone who walks underneath it later!
5. Hang your new chandelier up in any room for an instant rustic touch!
Antler Chandelier Wiring Kit
An antler chandelier is a beautiful and rustic way to add light to any room. But before you can enjoy its beauty, you need to wire it up! This process may seem daunting, but with our antler chandelier wiring kit, it’s easy.
Our kit comes with everything you need to wire your chandelier, including:
-A canopy for mounting the fixture
-3 feet of chain – enough to adjust the height of the chandelier to your liking
-6 feet of black fabric covered electrical cord – this will be barely visible once your chandelier is installed
-All necessary hardware for installation
Plus, we include step-by-step instructions so you can get your new antler chandelier up and running in no time.
How to Drill Antlers for Wiring
When it comes to wiring antlers, there are a few different ways that you can go about doing it. You can either use an electric drill or a hand drill. If you decide to go with an electric drill, then you will need to make sure that you have a good understanding of how to properly use it.
On the other hand, if you opt for a hand drill, then the process is much simpler and doesn’t require as much skill.
If you decide to go with an electric drill, then the first thing that you need to do is figure out what size bit you will need. This is important because if the bit is too small, then it won’t be able to create a large enough hole for the wire.
On the other hand, if the bit is too large, then it could damage the antlers. Once you have determined the proper size bit, simply attach it to your drill and start drilling into the antler. It’s important to keep in mind that you only want to drill through one side of the antler so that the other side remains intact.
Once you have drilled through one side of the antler, thread your wire through the hole and tie a knot on each end so that it doesn’t come loose. That’s really all there is to wiring antlers! If you follow these steps carefully, then your finished product should look great and be securely attached.
Antler Chandelier Hardware
Chandeliers are one of the most popular types of lighting fixtures, and antler chandeliers are a unique and stylish option. Antler chandelier hardware can be made from several different types of materials, including real antlers, cast resin, or even wrought iron.
The most important factor to consider when choosing antler chandelier hardware is the overall style of the room where it will be installed.
For example, a rustic-themed room would benefit from a chandelier with more natural looking materials, while a contemporary space might be better suited for something with cleaner lines. Once you have an idea of the style you’re going for, you can start narrowing down your options.
If you’re looking for a truly unique piece, then opting for real antlers is probably your best bet.
These pieces will add an undeniable touch of luxury to any space. However, they can be quite expensive and may require more maintenance than other options. If you prefer something that looks similar to real antlers but is more affordable and low-maintenance, then cast resin or wrought iron hardware might be a better option for you.
No matter what type of material you choose, make sure to select hardware that compliments the rest of your decor. With so many different styles available, it should be easy to find something that fits in perfectly with your existing aesthetic.
Diy Antler Light
If you’re looking for a unique and rustic lighting option for your home, consider making your own antler light! This DIY project is relatively easy to do, and you can customize it to fit your space perfectly. Here’s what you’ll need:
-1 set of deer antlers (you can find these at most hunting supply stores)
-1 light bulb socket (available at any hardware store)
-1 length of electrical wire
-1 small piece of wood
– drill
– saw
First, clean the antlers with soap and water to remove any dirt or debris. Next, use the drill to create a hole in the center of the antlers, large enough to accommodate the light bulb socket. Then, thread the electrical wire through the hole and attach the socket.
Finally, cut a small piece of wood to use as a base for the antlers, and screw it into place. That’s it! Your new antler light is ready to use.
Credit: www.eaglebrae.co.uk
How Do You Attach Antlers to a Chandelier?
When it comes to attaching antlers to a chandelier, there are a few different methods that you can use. The most common method is to simply screw the antlers into the chandelier. You will want to make sure that you use screws that are long enough to go through the entire thickness of the antler, as well as the metal of the chandelier.
Another option is to glue the antlers onto the chandelier. This can be a bit more tricky, and you will want to make sure that you use a strong adhesive. A third option is to weld the antlers onto the chandelier.
This is probably the strongest attachment method, but it will also require access to a welder. Whichever attachment method you choose, just make sure that the antlers are securely attached so they don’t fall off and break!
How Do You Make Deer Antlers Light?
Deer antlers are one of the most popular items used in home decor, particularly during the holiday season. Many people choose to hang them on their walls or use them as part of a mantel display. But what if you want to make your deer antlers lighter?
There are a few different ways that you can go about this. One option is to spray paint them with a light-colored paint. This will give them an overall lighter appearance and can be easily done at home.
Another option is to dip the tips of the antlers in white wax. This will create a bright, shiny look that will really stand out. If you want something a little more permanent, you can also have the tips of the antlers plated with gold or silver.
This will give them a beautiful metallic finish that will catch the eye no matter where they’re displayed.
No matter which method you choose, making your deer antlers lighter is a great way to add some extra personality to your home décor. So get creative and see what looks best in your space!
How Do You Screw Antlers Together?
There are a few ways to screw antlers together, but the most common and effective way is to use T-nuts. First, you’ll need to drill a pilot hole in the center of each antler. Next, insert a T-nut into each pilot hole and screw it in until it’s tight.
Finally, use screws to attach the two antlers together at the desired angle.
If you’re not using T-nuts, you can still screw antlers together, but it’s more difficult to get a tight connection. To do this, first drill a pilot hole in one antler.
Next, thread a screw through the pilot hole and into the second antler. Finally, use washers and nuts to tighten everything down.
What Can I Make Out of Deer Antlers?
One of the most popular questions we get asked is “What can I make out of deer antlers?”. While there are many different ways to answer this question, today we will focus on a few popular uses for antlers.
Chandeliers and light fixtures are a great way to add some rustic flair to your home décor.
Antlers can be used to create unique and stylish chandeliers that are sure to be a conversation piece in any room. For those who are handy with woodworking, crafting your own chandelier is a fun project that can be customized to fit your specific taste.
Another popular use for antlers is making jewelry.
Deer antler rings, necklaces and earrings are all beautiful pieces that can be made at home with minimal supplies. These make great gifts for family and friends or can even be sold online or at craft fairs. If you’re not into DIY projects, there are also many companies that sell ready-made deer antler jewelry.
Deer antlers can also be used in more practical ways such as making knife handles or creating storage solutions such as coat racks or key holders. The possibilities are endless when it comes to puttying creativity and functionality together. So next time you find yourself wondering what to do with those extra antlers, remember these ideas!
DIY Antler Chandelier "FIRE"
Conclusion
In this blog post, the author gives a step-by-step guide on how to build an antler chandelier. The author starts by explaining what tools and materials you will need for this project. Next, the author walks you through each step of the process, from preparing the antlers to attaching them to the frame.
Finally, the author offers some tips on how to finish off your chandelier and make it look its best.